


How should you carry out the office's internal strip-out process smoothly?
- Admin

- Mar 6, 2025
- 2 min read

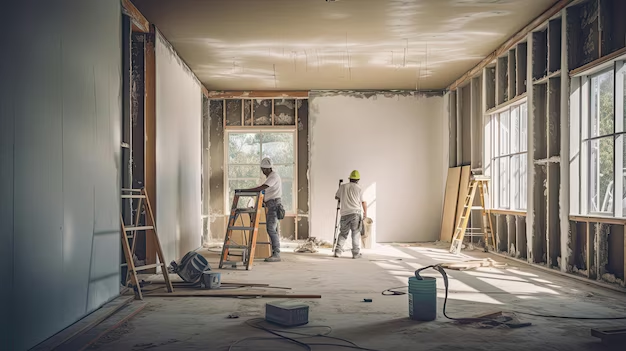
Internal strip out is necessary when renovating, refurbishing, or preparing an office for a new tenant. This entails stripping the office of all non-structural items, fittings, and fixtures to leave it as a blank canvas. Successful planning and implementation are critical in ensuring a hassle-free and efficient internal strip out, reducing disturbance and having the space ready for its next purpose.
Planning and Assessment for Your Internal Strip Out:
Careful planning is the key to a successful strip-out.
Assess the Scope: Visit the office to establish which areas and items should be removed. These may include partitions, flooring, ceiling tiles, fixtures, and fittings.
Health and Safety: Carefully assess to find out areas that could pose hazards such as asbestos or electrical hazards. Make sure all labourers are trained in safe removal.
Utility Disconnection: Shut off all utilities (electricity, water, gas) correctly prior to the strip out to avoid accidents.
Salvage and Recycling: Identify whether materials or fixtures can be salvaged or recycled, i.e., doors, light fixtures, or cabinets.
Get Approvals: Seek approvals from the building manager, owner, local council, and other tenants to meet local building codes.
Step-by-Step Guide to the Strip Out Process:
1. Instructions:
Adhere to the following procedure for a productive internal strip-out.
2. Protective Measures
Adopt safety measures, such as barricades, warning signs, and personal protective equipment (PPE) for staff. Install dust barriers to keep debris within and reduce interruptions.
3.Dismantling and Removal
Workstations and Furniture: Demolish and clear all existing workstations, screens, furniture, and fixtures to have easier access to floors, ceilings, and walls.
Built-in Joinery and Partitions: Demolish all built-in joinery, cupboards, and partition walls.
Ceilings and Flooring: Strip out existing ceiling grids, tiles, suspended ceilings, and plasterboard ceilings. Remove false flooring, such as wood, vinyl, and carpet.
Internal Elements: The strip out of internal elements should involve the removal of non-structural elements such as wall linings, internal partition walls, built-ins, floor coverings, ceilings, tiles, internal glazing, and pipework.
4. Waste Disposal and Site Cleaning
Effective Waste Disposal: Load all the waste into tub bins and transport it off-site using tipper trucks for efficient and quick removal.
Green Disposal: Choose strip-out services that provide environmentally friendly waste disposal, aiming at 100% landfill diversion through recycling and reduction efforts.
5. Special Considerations for a Smooth Internal Strip Out
Take these considerations into account to have a smooth process.
Working in Occupied Buildings
Phased Approach: If the building is in use, phase the strip out, for example, floor by floor, relocating staff accordingly to provide a seamless transition.
Saving Valuable Items
Clear Out Items to Save: Have all items you wish to save cleared out prior to the strip out.
Conclusion
A well-planned internal strip out is crucial for any office renovation or refurbishment project. By carefully assessing the scope, implementing safety measures, and following a systematic removal process, you can ensure a smooth and efficient internal strip out, leaving a clean and safe space ready for its next transformation. Engaging a professional strip out service can further streamline the process, ensuring minimal disruption and adherence to environmental standards.


Comments